Arch Linux ARM on an M1 Mac with VMware Fusion
Arch Linux ARM is a simple and lightweight Linux distribution that is actually the official port of the Arch Linux operating system. It’s built especially for processors that support ARM architecture. With its use, the users can have full control of the system and shape their system according to their needs.
In this tutorial, we provide the detailed procedure to install Arch Linux ARM on a Macbook Pro (with Apple M1 Pro) running VMware Fusion 13.0.
Prerequisites
Get Arch Linux ARM (aarch64) ISO
The ISO file for Apple Silicon can be downloaded here.
Create a New Virtual Machine in VMware Fusion
For detailed information, please refer to the VMware Knowledge Base.
Enter the Command-Line Installation
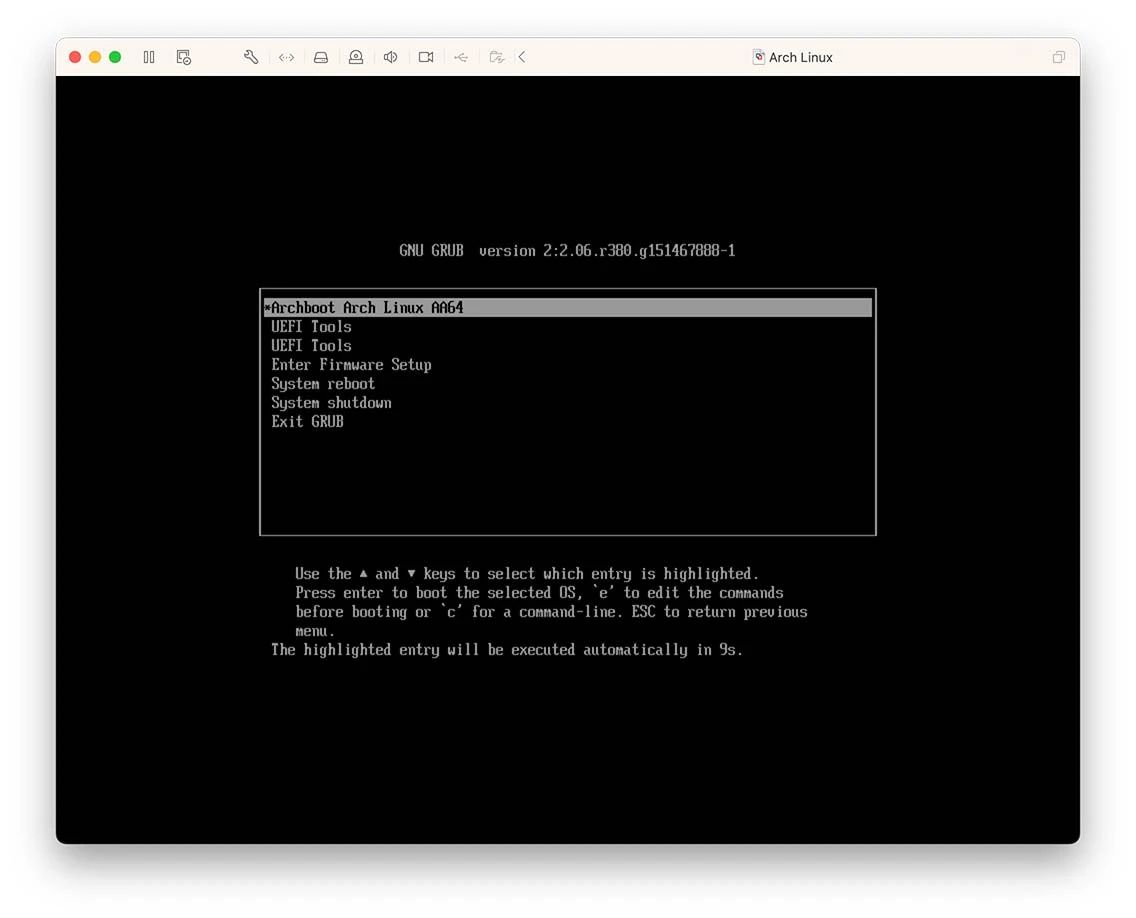
In VMware Fusion, boot from the downloaded ISO and choose the first option (Archboot Arch Linux AA64) to start the installation.
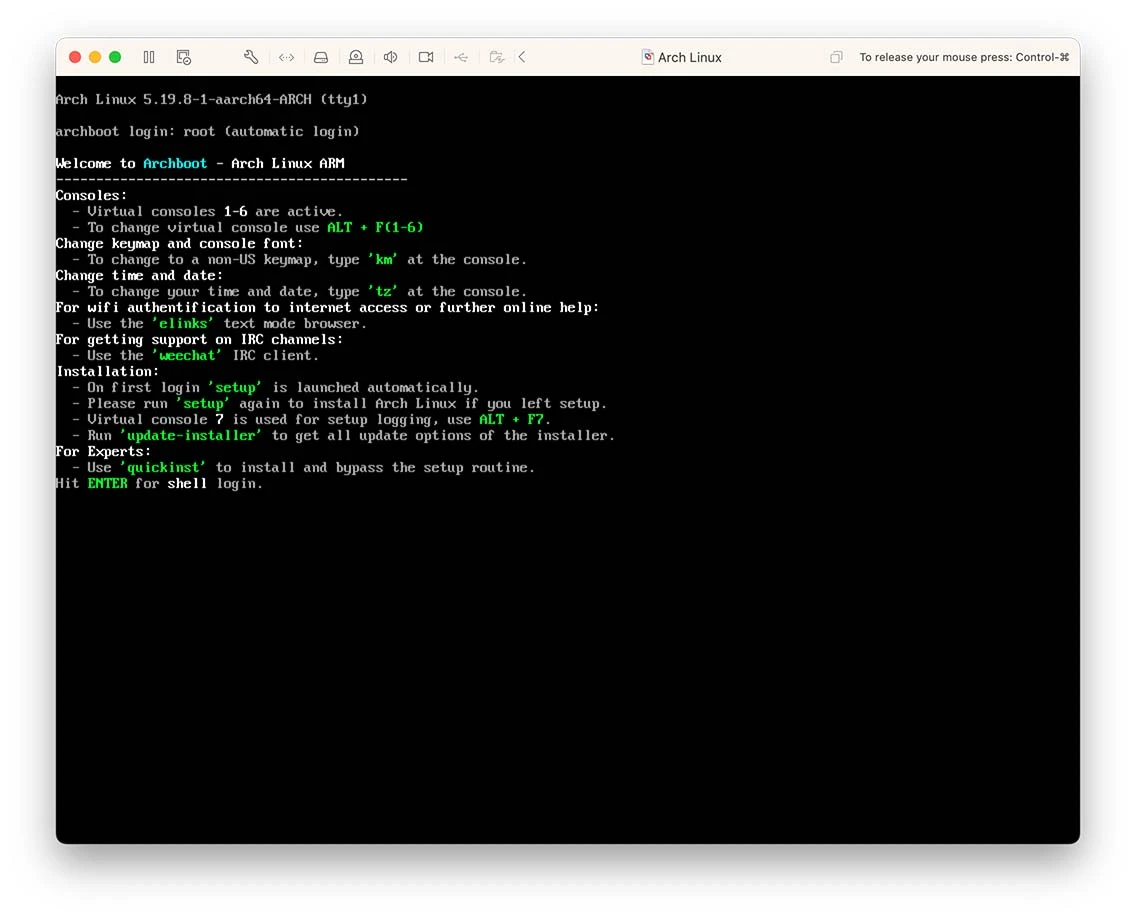
Hit “Enter” for shell login after the below screen appears.
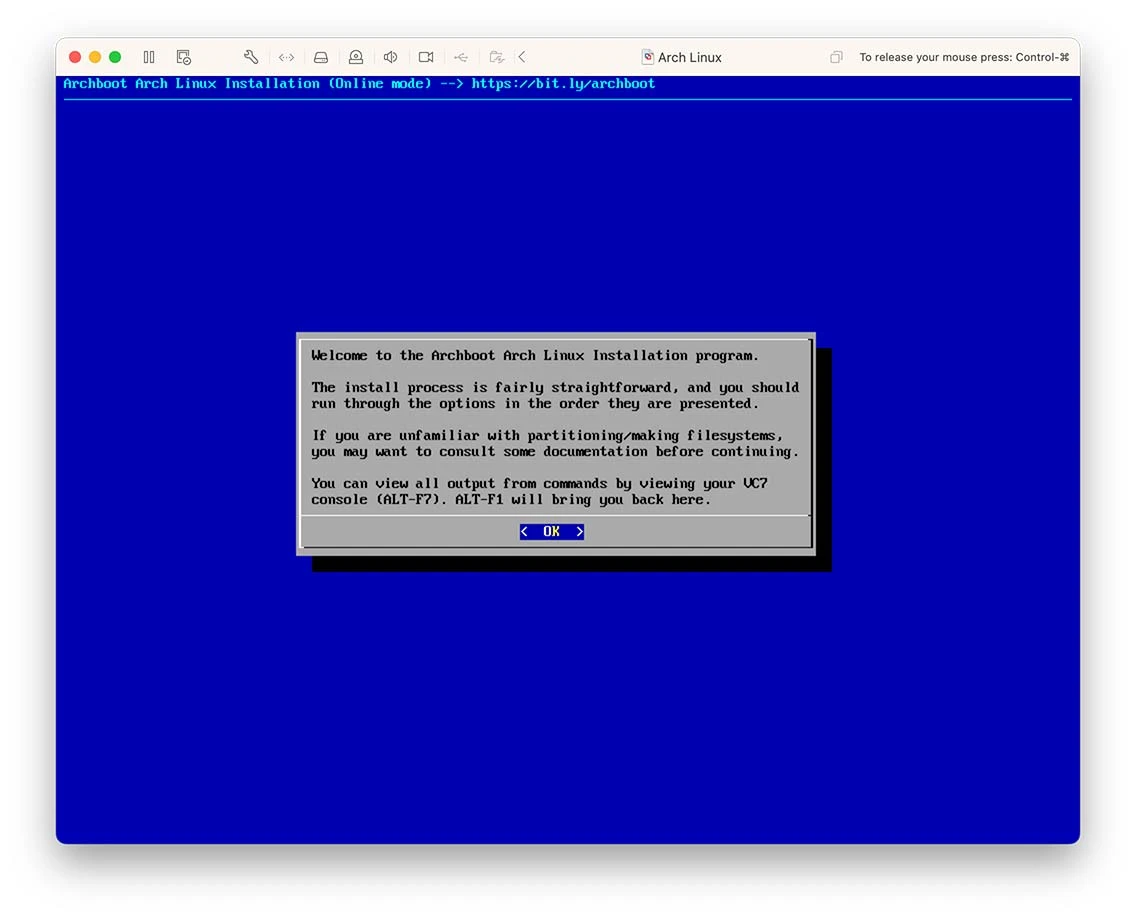
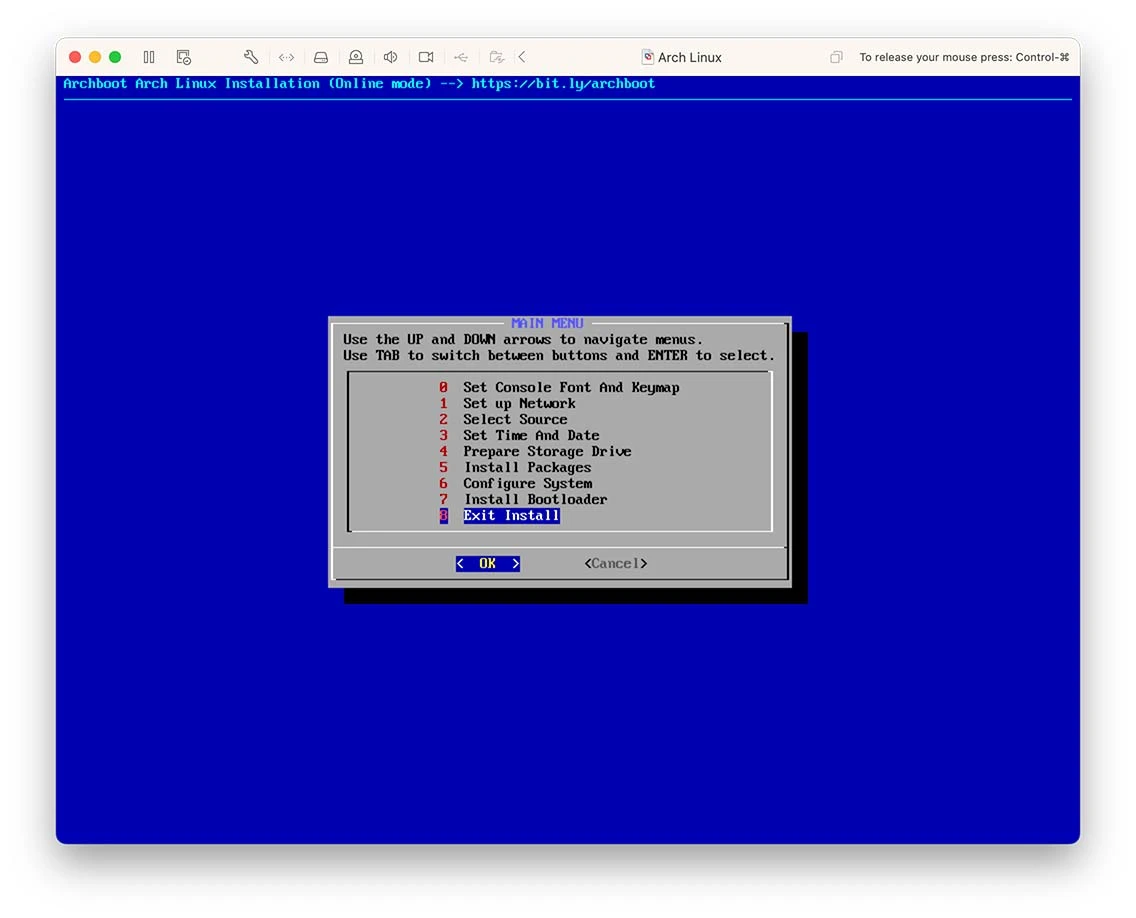
Hit “Enter” for OK in the welcome screen of the Archboot Arch Linux Installation program.
Choose the last option (Exit Install) in the main menu to enter the command-line installation.
Install Basic Linux System
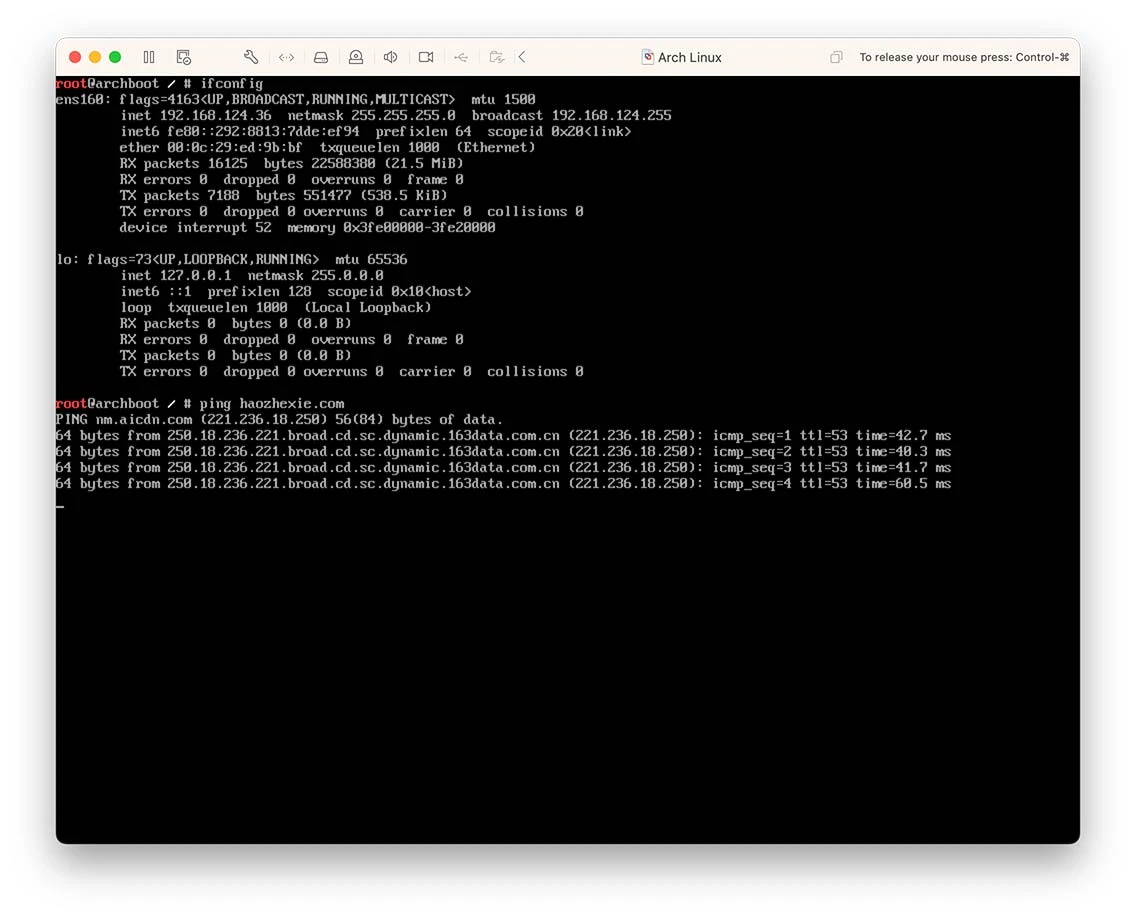
Before starting, please make sure that the virtual machine has connected to the Internet.
Create the Disk Partitions
First, use fdisk -l to list the available disks.
root@archboot / # fdisk -l
Disk /dev/nvme0n1: 64 GiB, 68719476736 bytes, 134217728 sectors
Disk model: VMware Virtual NVMe Disk
Units: sectors of 1 * 512 = 512 bytes
Sector size (logical/physical): 512 bytes / 512 bytes
I/O size (minimum/optimal): 512 bytes / 512 bytes
Then, type fdisk /dev/nvme0n1 to set up partitions on the disk.
root@archboot / # fdisk /dev/nvme0n1

Welcome to fdisk (util-linux 2.38.1).
Changes will remain in memory only, until you decide to write them.
Be careful before using the write command.

Command (m for help): g
Created a new GPT disklabel (GUID: 4A9A49B6-EE50-4A4B-A097-78650B1BEDC1).

Command (m for help): n
Partition number (1-128, default 1):
First sector (2048-134217694, default 2048):
Last sector, +/-sectors or +/-size{K,M,G,T,P} (2048-134217694, default 134215679): +512M
Created a new partition 1 of type 'Linux filesystem' and of size 512 MiB.

Command (m for help): t
Selected partition 1
Partition type or alias (type L to list all): 1
Changed type of partition 'Linux filesystem' to 'EFI System'

Command (m for help): n
Partition number (2-128, default 2):
First sector (1050624-134217694, default 1050624):
Last sector, +/-sectors or +/-size{K,M,G,T,P} (1050624-134217694, default 134215679):
Created a new partition 2 of type 'Linux filesystem' and of size 63.5 GiB.

Command (m for help): p
Disk /dev/nvme0n1: 64 GiB, 68719476736 bytes, 134217728 sectors
Disk model: VMware Virtual NVMe Disk
Units: sectors of 1 * 512 = 512 bytes
Sector size (logical/physical): 512 bytes / 512 bytes
I/O size (minimum/optimal): 512 bytes / 512 bytes
Disklabel type: gpt
Disk identifier: 4A9A49B6-EE50-4A4B-A097-78650B1BEDC1

Device         Start   End       Sectors   Size  Type
/dev/nvme0n1p1 2048    1050623   1048576   512M  EFI system
/dev/nvme0n1p2 1050624 134215679 133165056 63.5G Linux filesystem

Command (m for help): w
The partition table has been altered.
Calling ioctl() to re-read partition table.
Syncing disks.
Create the File System
We have already set up an EFI partition on /dev/nvme0n1p1 for the GPT-based partition table. The following command creates an ext4 file system on the second partition of the disk.
mkfs.ext4 /dev/nvme0n1p2
Mount Partitions
Mount /dev/nvme0n1p2 and /dev/nvme0n1p1 to /mnt and /mnt/boot respectively.
root@archboot / # mount /dev/nvme0n1p2 /mnt
root@archboot / # mkdir /mnt/boot
root@archboot / # mount /dev/nvme0n1p1 /mnt/boot
Set up the Arch Linux Mirror
Edit the /etc/pacman.d/mirrorlist to choose the mirror of Arch Linux. For Chinese users, I recommend using https://mirrors.tencent.com/archlinuxarm/$arch/$repo.
Don’t forget to use pacman -Syy to update the mirror cache after editing /etc/pacman.d/mirrorlist.
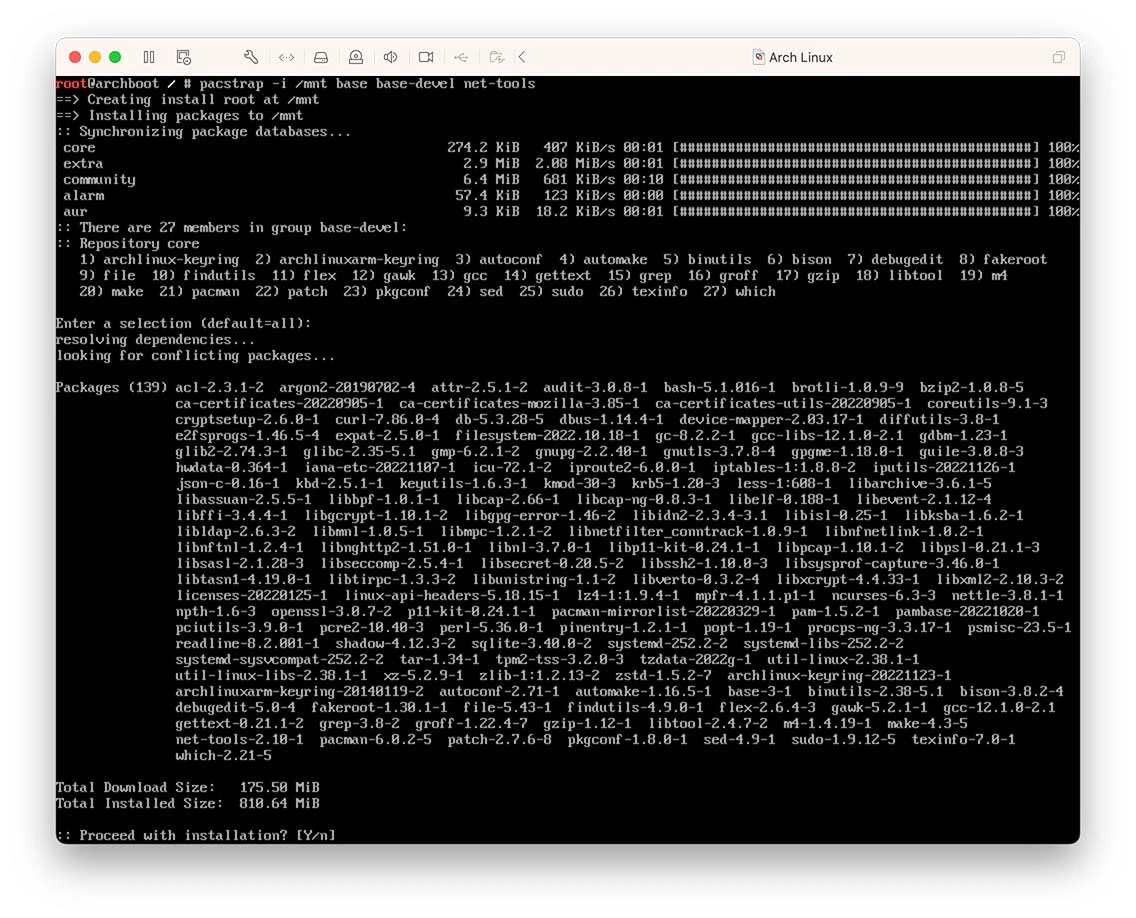
Set up the Basic Linux System
Use the following command to set up the basic Linux system.
pacstrap -i /mnt base base-devel net-tools
Use the default options by hitting “Enter” multiple times.
Generate the File System Table (fstab)
Use the following command to generate the fstab file at /mnt/etc/fstab.
genfstab -U -p /mnt >> /mnt/etc/fstab
Install the Basic Linux
Use arch-chroot to enter the newly set up system. For more information on chroot, please refer to Wikipedia.
arch-chroot /mnt /bin/bash
Set up Timezone
The following command is used to set the local time to Asia/Shanghai. Please change to the proper timezone according to your country.
ln -s /usr/share/zoneinfo/Asia/Shanghai /etc/localtime
To make sure that the time is consistent with the time in BIOS, add the following lines to /etc/adjtime.
0.000000 0 0.000000
0
LOCAL
Set up Keyboard and Font
Add the following lines to /etc/vconsole.conf.
KEYMAP=us
FONT=
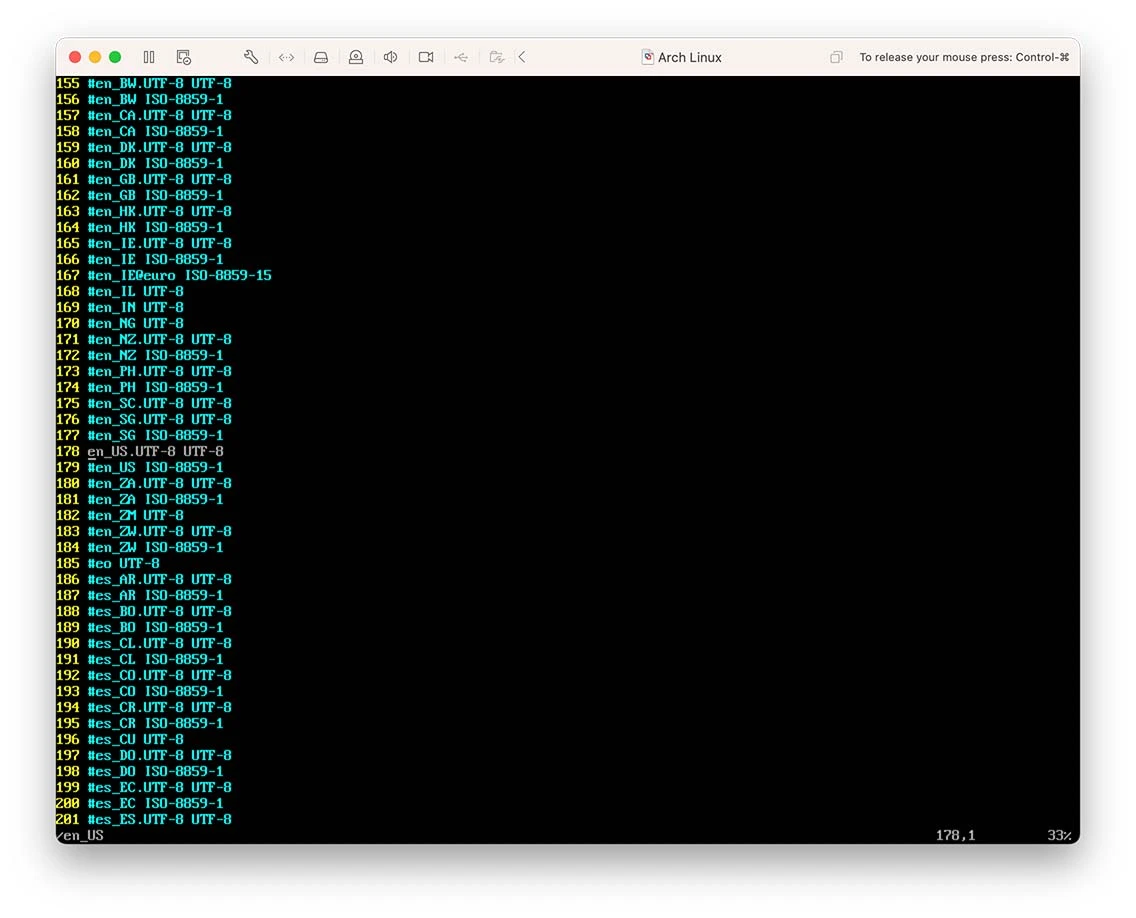
Set up Locale
Remove the # symbol before the line en_US.UTF-8 in the file /etc/locale.gen to enable the support of en_US.UTF-8. If you need to display Simplified Chinese in the installed Arch Linux, remove the # symbol before the line zh_CN.UTF-8.
After editing /etc/locale.gen, run the following command to set the system language to English.
locale-gen
echo LANG=en_US.UTF-8 >> /etc/locale.conf
Set up Hostname
echo "ArchLinux-VM" > /etc/hostname
Set up Password for Users
The following command is used for setting the password for root.
passwd
You may also create another user (e.g. archuser) with the following command
useradd -m -g users -G wheel -s /bin/bash archuser
passwd archuser
Set up the ramdisk Environment
Use the following command to set up the ramdisk environment.
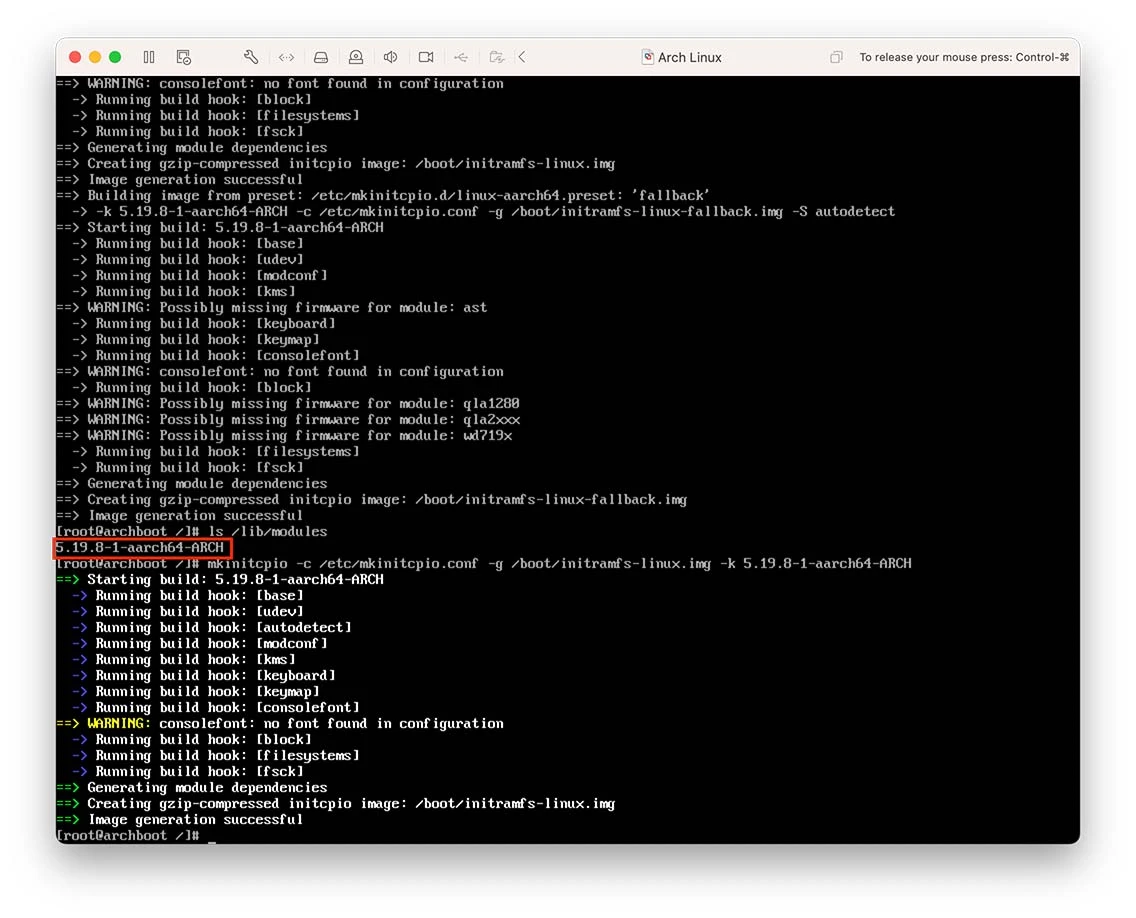
pacman -S linux mkinitcpio
mkinitcpio -c /etc/mkinitcpio.conf -g /boot/initramfs-linux.img -k `ls /lib/modules`
Install Boot Loader
pacman -S grub efibootmgr
grub-install --target=arm64-efi --efi-directory=/boot --bootloader-id=grub /dev/nvme0n1
If everything works well, the following output should appear
Installing for arm64-efi platform.
Installation finished. No error reported.
Then, use the following command to generate the GRUB config file.
grub-mkconfig > /boot/grub/grub.cfg
Reboot
Before rebooting the system, we need to install dhcpcd to ensure that an IP address can be obtained after reboot.
pacman -S dhcpcd
Then, use the following command to reboot the system.
exit
umount /mnt/boot
umount /mnt
reboot
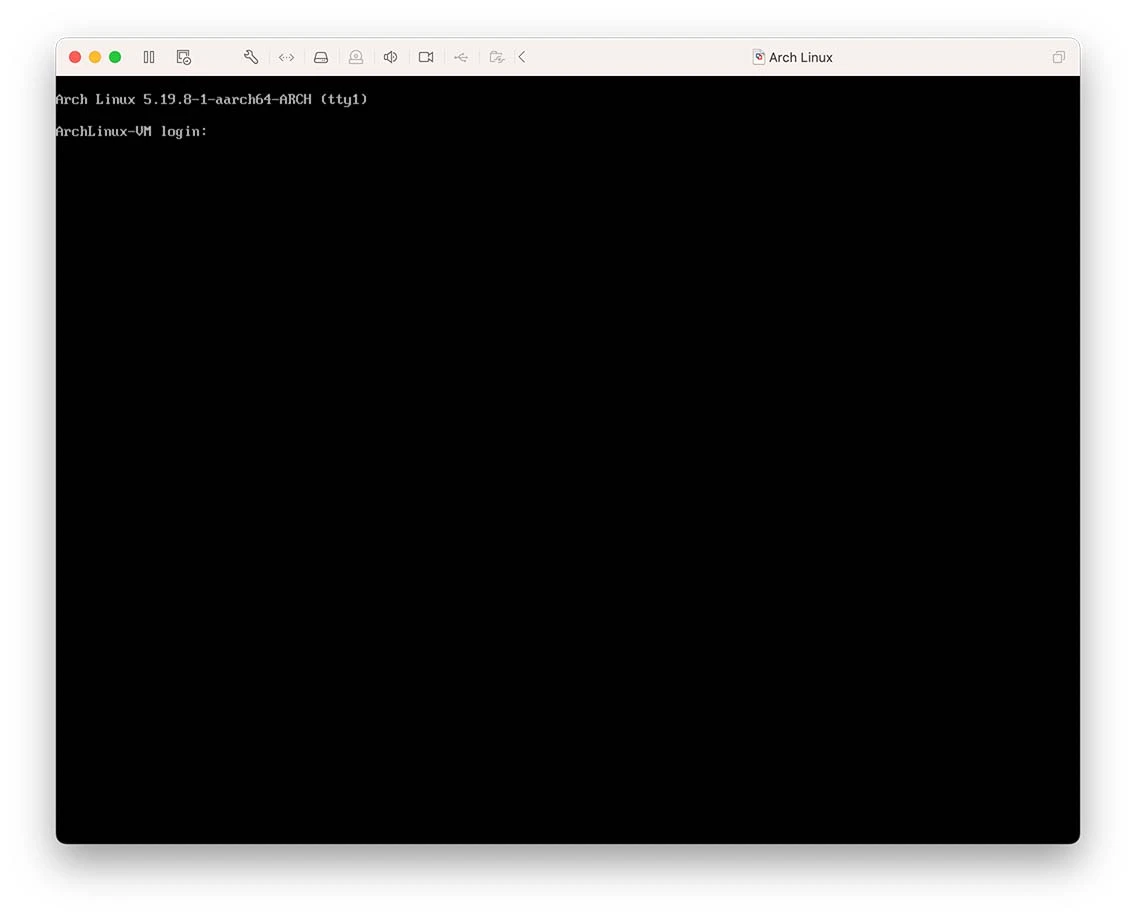
After reboot, a command-line-based login screen should appear as expected.
Install Applications on Linux
After rebooting, you need to connect to the Internet manually.
First, use the ip link command to list the network interfaces.
1: lo: <LOOPBACK,UP,LOWER_UP> mtu 65536 qdisc noqueue state UNKNOWN mode DEFAULT group default qlen 1000
    link/loopback 00:00:00:00:00:00 brd 00:00:00:00:00:00
2: ens160: <BROADCAST,MULTICAST> mtu 1500 qdisc noop state DOWN mode DEFAULT group default qlen 1000
    link/ether 00:0c:29:ed:9b:bf brd ff:ff:ff:ff:ff:ff altname enp2s0
Then, use the following command to start the network interface
ip link set ens160 up
Now, the network interface should appear in the output of ifconfig.
ens160: flags=4163<UP,BROADCAST,RUNNING,MULTICAST>  mtu 1500
        inet6 fe80::20c:29ff:feed:9bbf  prefixlen 64  scopeid 0x20<link>
        ether 00:0c:29:ed:9b:bf  txqueuelen 1000  (Ethernet)
        RX packets 0  bytes 0 (0.0 B)
        RX errors 0  dropped 0  overruns 0  frame 0
        TX packets 4  bytes 586 (586.0 B)
        TX errors 0  dropped 0  overruns 0  carrier 0  collisions 0
        device interrupt 55  memory 0x3fe00000-3fe20000

lo: flags=73<UP,LOOPBACK,RUNNING>  mtu 65536
        inet 127.0.0.1  netmask 255.0.0.0
        inet6 ::1  prefixlen 128  scopeid 0x10<host>
        loop  txqueuelen 1000  (Local Loopback)
        RX packets 0  bytes 0 (0.0 B)
        RX errors 0  dropped 0  overruns 0  frame 0
        TX packets 0  bytes 0 (0.0 B)
        TX errors 0  dropped 0  overruns 0  carrier 0  collisions 0
After that, use the dhcpcd command to obtain an IP address for the network interface. The output of dhcpcd is as follows.
dhcpcd-9.4.1 starting
dev: loaded udev
DUID 00:04:12:b0:4d:56:a7:95:64:7e:cc:28:73:ab:f1:ed:9b:bf
ens160: IAID 29:ed:96:bf
ens160: soliciting an IPv6 router
ens160: soliciting a DHCP lease
ens160: offered 192.168.124.36 from 192.168.124.1
ens160: probing address 192.168.124.36/24
ens160: leased 192.168.124.36 for 86400 seconds
ens160: adding route to 192.168.124.0/24
ens160: adding default route via 192.168.124.1
forked to background, child pid 468
Please install the networkmanager to make sure the above procedure can be automatically done at the startup.
pacman -S networkmanager
systemctl enable NetworkManager
Set up Desktop Environment
Use the following command to install the GNOME desktop environment.
pacman -S gnome
The following commands ensure that the GNOME desktop environment runs automatically at startup.
systemctl enable gdm
To start GNOME now, please use the following command.
systemctl start gdm
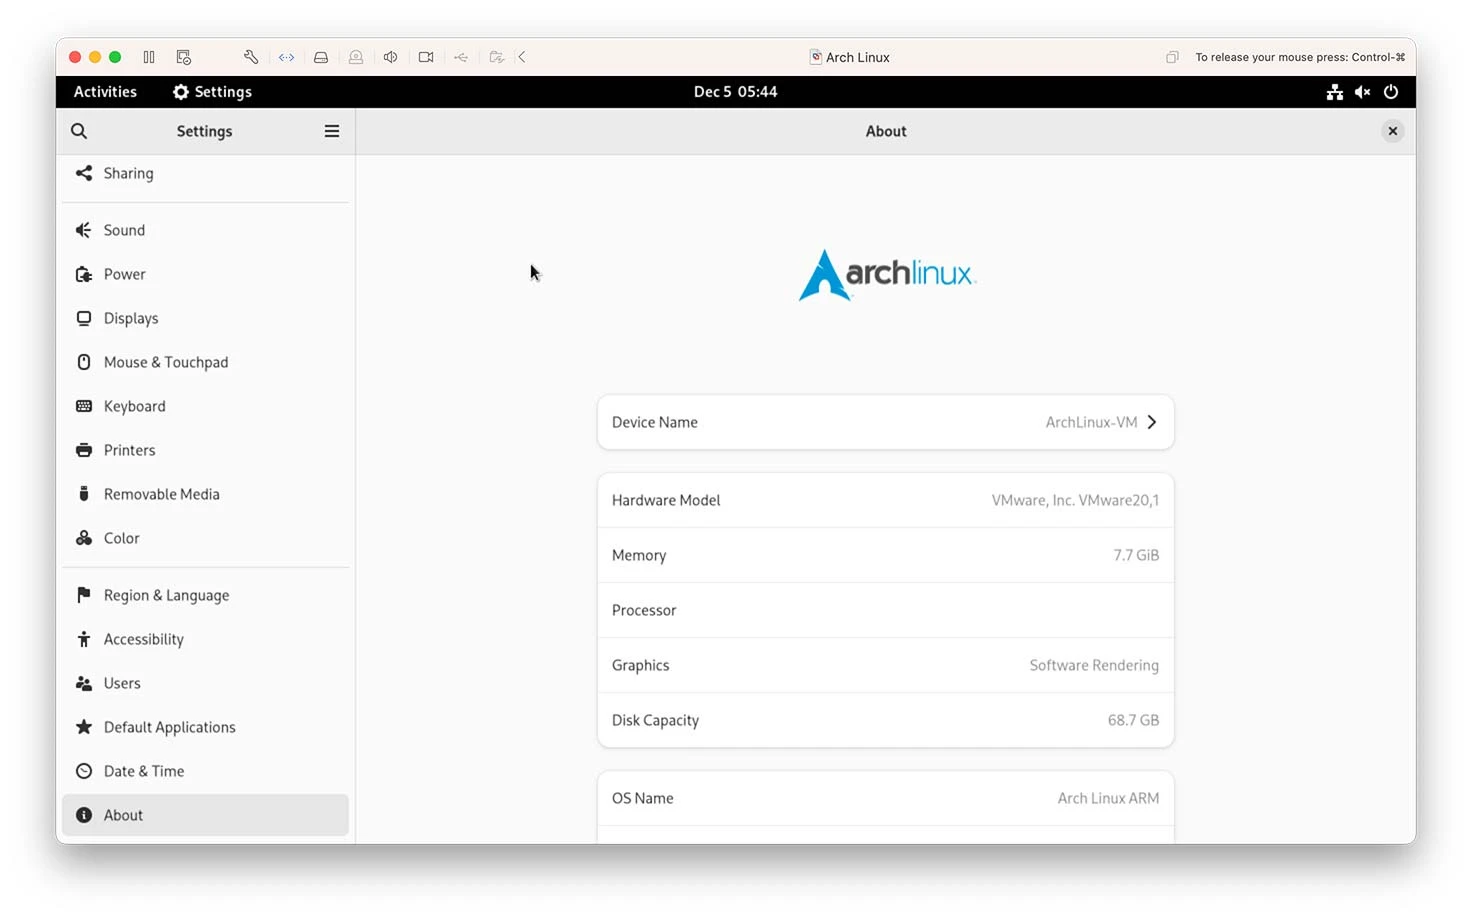
Now, the installation is finished.
The Disqus comment system is loading ...
If the message does not appear, please check your Disqus configuration.